8/25/2014

Configure Network Bonding in Ubuntu Server

Overview


Network bonding is the aggregation or combination of multiple lan cards into a single bonded interface to provide high availability and redundancy. Network bonding is  also known as NIC teaming.

In this article we will discuss how to configure network bonding in Ubuntu 14.04 LTS Server. In my scenario I have two Lan Cards : eth0 & eth1 and will create a bond interface bond0 with active-passive or active-backup mode.

Step:1 Install bonding Kernel module using below command


root@mail:~#  apt-get install ifenslave-2.6

Step:2 Load the kernel module.


Edit the file /etc/modules and add the bonding module at the end .

root@mail:~# vi /etc/modules
# /etc/modules: kernel modules to load at boot time.
#
# This file contains the names of kernel modules that should be loaded
# at boot time, one per line. Lines beginning with "#" are ignored.
# Parameters can be specified after the module name.
lp
rtc
bonding

Save & exit the file

Now load the module using modprobe command as shown below :

# sudo modprobe bonding

Step:3 Edit interface config file.


# sudo vi /etc/network/interfaces

# interfaces(5) file used by ifup(8) and ifdown(8)
auto lo
iface lo inet loopback

#eth0 is manually configured, and slave to the bondo interface

auto eth0
iface eth0 inet manual
bond-master bond0
bond-primary eth0

#manually configured eth1 and second interface used in bonding(bond0)

auto eth1
iface eth1 inet manual
bond-master bond0

# bond0 is the bonding NIC and can be used like any other normal NIC.

# bond0 is configured using static network information.
auto bond0
iface bond0 inet static
address 192.168.1.151
gateway 192.168.1.1
netmask 255.255.255.0
dns-nameservers 4.2.2.2
bond-mode active-backup
bond-miimon 100
bond-slaves none

Step:4 Restart the networking service & see the bond interface status


root@mail:~# service networking restart

Verify the bond interface using below command :

# ip add

ip-add
We can also use ifconfig command to see the bond interface.

Now check the bond interface status using below command :

# cat /proc/net/bonding/bond0

verify-bond-interface

Note : To do the testing we can down one interface and access the server and see the bond status.

8/21/2014

How to set up a Samba file server to use with Windows clients

According to the Samba project web site, Samba is an open source/free software suite that provides seamless file and print services to SMB/CIFS clients. Unlike other implementations of the SMB/CIFS networking protocol (such as LM Server for HP-UX, LAN Server for OS/2, or VisionFS), Samba (along with its source code) is freely available (at no cost to the end user), and allows for interoperability between Linux/Unix servers and Windows/Unix/Linux clients.
For these reasons, Samba is the preferred solution for a file server in networks where different operating systems (other than Linux) coexist - the most common setup being the case of multiple Microsoft Windows clients accessing a Linux server where Samba is installed, which is the situation we are going to deal with in this article.
Please note that on the other hand, if our network consists of only Unix-based clients (such as Linux, AIX, or Solaris, to name a few examples), we can consider using NFS (although Samba is still an option in this case), which has greater reported speeds.

Installing Samba in Debian and CentOS

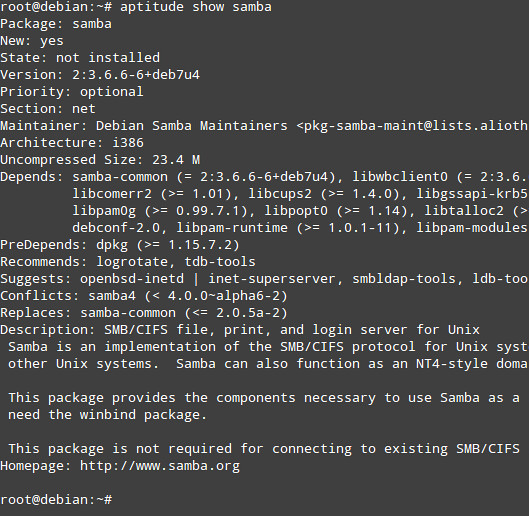
Before we proceed with the installation, we can use our operating system's package management system to look for information about Samba:
On Debian:
# aptitude show samba
On CentOS:
# yum info samba
In the following screenshot we can see the output of 'aptitude show samba' ('yum info samba' yields similar results):
Now let's install Samba (the screenshot below corresponds to the installation on a Debian 7 [Wheezy] server):
On Debian:
# aptitude install samba
On CentOS:
# yum install samba

Adding Users to Samba

For versions earlier than 4.x, a local Unix account is required for adding users to Samba:
# adduser
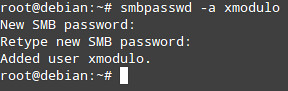
Next, we need to add the user to Samba using the smbpasswd command with the '-a' option, which specifies that the username following should be added to the local smbpasswd file. We will be prompted to enter a password (which does not necessarily have to be the same as the password of the local Unix account):
# smbpassword -a
Finally, we will give access to user xmodulo to a directory within our system that will be used as a Samba share for him (and other users as well, if needed). This is done by opening the /etc/samba/smb.conf file with a text editor (such as Vim), navigating to the end of the file, and creating a section (enclose name between square brackets) with a descriptive name, such as [xmodulo]:
1
2
3
4
5
6
7
8
9
# SAMBA SHARE
[xmodulo]
path = /home/xmodulo
available = yes
valid users = xmodulo
read only = no
browseable = yes
public = yes
writeable = yes
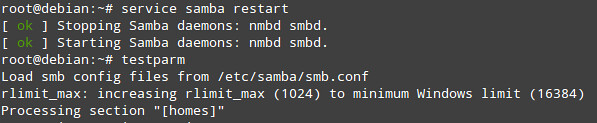
We must now restart Samba and -just in case- check the smb.conf file for syntax errors with the testparm command:
# service samba restart
# testparm
If there are any errors, they will be reported when testparm ends.

Mapping the Samba Share as a Network Drive on a Windows 7 PC

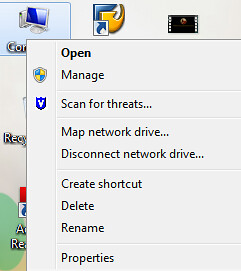
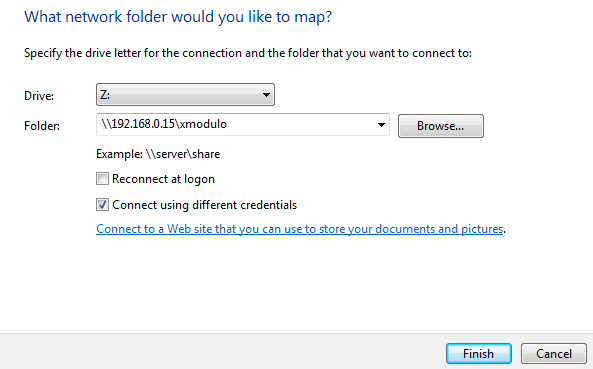
Right click on Computer, and select "Map network drive":
Type the IP address of the machine where Samba is installed, followed by the name of the share (this is the name that is enclosed between single brackets in the smb.conf file), and make sure that the "Connect using different credentials" checkbox is checked:
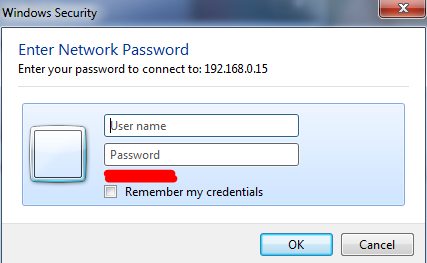
Enter the username and password that were set with 'smbpasswd -a' earlier:
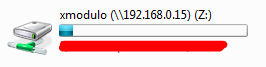
Go to Computer and check if the network drive has been added correctly:
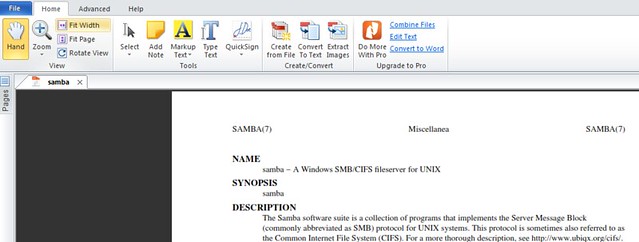
As a test, let's create a pdf file from the man page of Samba, and save it in the /home/xmodulo directory:
Next, we can verify that the file is accessible from Windows:
And we can open it using our default pdf reader:
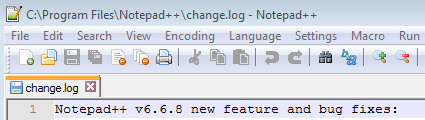
Finally, let's see if we can save a file from Windows in our newly mapped network drive. We will open the change.log file that lists the features of Notepad++:
and try to save it in Z:\ as a plain text file (.txt extension); then let's see if the file is visible in Linux:

Enabling quotas

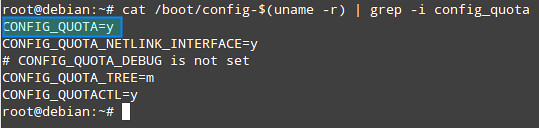
As a first step, we need to verify whether the current kernel has been compiled with quota support:
# cat /boot/config-$(uname -r) | grep -i config_quota
Each file system has up to five types of quota limits that can be enforced on it: user soft limit, user hard limit, group soft limit, group hard limit, and grace time.
We will now enable quotas for the /home file system by adding the usrquota and grpquota mount options to the existingdefaults option in the line that corresponds to the /home filesystem in the /etc/fstab file, and we will remount the file system in order to apply the changes:
Next, we need to create two files that will serve as the databases for user and group quotas: aquota.user andaquota.group, respectively, in /home. Then, we will generate the table of current disk usage per file system with quotas enabled:
# quotacheck -cug /home
# quotacheck -avugm
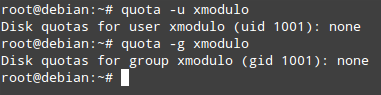
Even though we have enabled quotas for the /home file system, we have not yet set any limits for any user or group. Check for quota information for existing user/group:
# quota -u
# quota -g
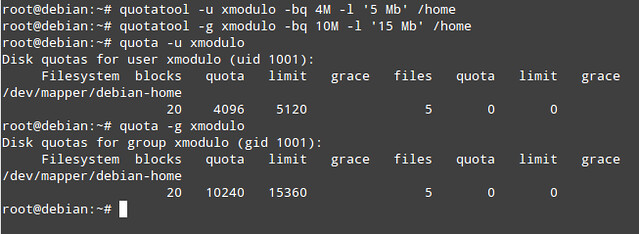
Finally, the last couple of steps consist of assigning the quotas per user and / or group with the quotatool command (note that this task can also be performed by using edquota, but quotatool is more straightforward and less error-prone).
To set the soft limits to 4 MB and the hard limit to 5 MB for the user called xmodulo, and 10 MB / 15 MB for the xmodulogroup:
# quotatool -u xmodulo -bq 4M -l '5 Mb' /home
# quotatool -g xmodulo -bq 10M -l '15 Mb' /home
And we can see the results in Windows 7 (3.98 MB free of 4.00 MB):

7/11/2014

How to use systemd for system administration on linux

Basic Usage of systemctl

systemctl is the command that substitutes the old "/etc/init.d/foo start/stop", but also does a lot more, as you can learn from its man page.
Some basic use-cases are:
  • systemctl - list all loaded units and their state (where unit is the term for a job/service)
  • systemctl list-units - list all units
  • systemctl start [NAME...] - start (activate) one or more units
  • systemctl stop [NAME...] - stop (deactivate) one or more units
  • systemctl disable [NAME...] - disable one or more unit files
  • systemctl list-unit-files - show all installed unit files and their state
  • systemctl --failed - show which units failed during boot
  • systemctl --type=mount - filter for types; types could be: service, mount, device, socket, target
  • systemctl enable debug-shell.service - start a root shell on TTY 9 for debugging
For more convinience in handling units, there is the package systemd-ui, which is started as user with the commandsystemadm.
Switching runlevels, reboot and shutdown are also handled by systemctl:
  • systemctl isolate graphical.target - take you to what you know as init 5, where your X-server runs
  • systemctl isolate multi-user.target - take you to what you know as init 3, TTY, no X
  • systemctl reboot - shut down and reboot the system
  • systemctl poweroff - shut down the system
All these commands, other than the ones for switching runlevels, can be executed as normal user.

Basic Usage of journalctl

systemd does not only boot machines faster than the old init system, it also starts logging much earlier, including messages from the kernel initialization phase, the initial RAM disk, the early boot logic, and the main system runtime. So the days where you needed to use a camera to provide the output of a kernel panic or otherwise stalled system for debugging are mostly over.
With systemd, logs are aggregated in the journal which resides in /var/log/. To be able to make full use of the journal, we first need to set it up, as Debian does not do that for you yet:
# addgroup --system systemd-journal
# mkdir -p /var/log/journal
# chown root:systemd-journal /var/log/journal
# gpasswd -a $user systemd-journal
That will set up the journal in a way where you can query it as normal user. Querying the journal with journalctl offers some advantages over the way syslog works:
  • journalctl --all - show the full journal of the system and all its users
  • journalctl -f - show a live view of the journal (equivalent to "tail -f /var/log/messages")
  • journalctl -b - show the log since the last boot
  • journalctl -k -b -1 - show all kernel logs from the boot before last (-b -1)
  • journalctl -b -p err - shows the log of the last boot, limited to the priority "ERROR"
  • journalctl --since=yesterday - since Linux people normally do not often reboot, this limits the size more than -b would
  • journalctl -u cron.service --since='2014-07-06 07:00' --until='2014-07-06 08:23' - show the log for cron for a defined timeframe
  • journalctl -p 2 --since=today - show the log for priority 2, which covers emerg, alert and crit; resembles syslogpriorities emerg (0), alert (1), crit (2), err (3), warning (4), notice (5), info (6), debug (7)
  • journalctl > yourlog.log - copy the binary journal as text into your current directory
Journal and syslog can work side-by-side. On the other hand, you can remove any syslog packages like rsyslog orsyslog-ng once you are satisfied with the way the journal works.
For very detailed output, append "systemd.log_level=debug" to the kernel boot-time parameter list, and then run:
# journalctl -alb
Log levels can also be edited in /etc/systemd/system.conf.

Analyzing the Boot Process with systemd

systemd allows you to effectively analyze and optimize your boot process:
  • systemd-analyze - show how long the last boot took for kernel and userspace
  • systemd-analyze blame - show details of how long each service took to start
  • systemd-analyze critical-chain - print a tree of the time-critical chain of units
  • systemd-analyze dot | dot -Tsvg > systemd.svg - put a vector graphic of your boot process (requires graphvizpackage)
  • systemd-analyze plot > bootplot.svg - generate a graphical timechart of the boot process
systemd has pretty good documentation for such a young project under heavy developement. First of all, there is the0pointer series by Lennart Poettering. The series is highly technical and quite verbose, and holds a wealth of information. Another good source is the distro agnostic Freedesktop info page with the largest collection of links to systemd resources, distro specific pages, bugtrackers and documentation. A quick glance at:
# man systemd.index
will give you an overview of all systemd man pages. The command structure for systemd for various distributions is pretty much the same, differences are found mainly in the packaging.